...
Happy Earth Day! Welcome to all the scrapbook stashers that read Erica's blog and shop at
yourscrapbookstash.com! Erica directed you here for some tips to make your scrapbooking and life a little bit greener. I made a scrapbook especially for today using only scraps and things that normally would be considered trash. But it is
amazing how you can make your old stash and trash into a cool, earth-friendly scrapbook!
So where did I begin? In my scrap box of course!
 I am sure everyone who scraps has a box or a file or a drawer full of leftover paper. Maybe you feel too guilty to throw it away, like I am. Or maybe you think, "Someday, I'll do something with that." Today could be that day!
Ten Tips On How to Go Green in Scrapbooking And Life
For my scrapbook, I used part of a cardboard box for the front and back covers, the folder that my pictures came in that I ordered from Shutterfly (that made 4 pages!), the plastic packages that stickers and rub-ons came in, tags from clothing and bags, old ticket stubs, ribbon, flowers, brads, stickers, patterned paper, tags and chipboard leftover from other projects, green paint and colored pens and markers already in my stash. It is important to note that I bought nothing new for this scrapbook. That makes this not only earth-friendly (reduce! reuse! recycle!) but also friendly on your wallet!
The front cover:

Note: The blue horizontal tag is from my Kate London bag. I have kept it for 6 months. I am glad I did. It matches perfectly with the patterned paper! It reads (if you are having trouble reading the image-the photographer--meaning me--did not do so well on this shot--ha!): Here are a few of my favorite things...GO GREEN: Ten tips on how to "Go Green" in Scrapbooking and Life"
The front inside cover:
Pages 1-4 are made from the Shutterfly picture folder I talked earlier about.

I painted it green and used the label space to write the subject and date. This was fun!

Open The folder and you have 2 more pages. Green Scrapbook Tip #1 and another green tip are found here.
 Close the folder and you find page 4 with a green tip that gives you ideas on how to involve your kids in your green living.
Page 5 and 6 were also fun. I made those two pages out of a small plastic package that some scrapbook embellishments came in.
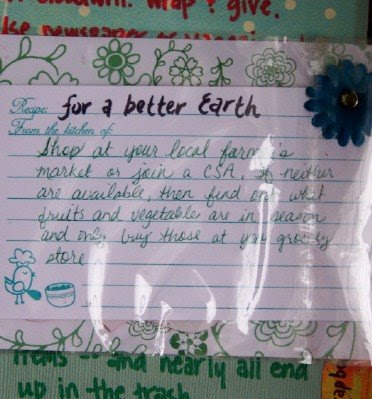 Here is the back or page 6:
 Yes, those journaling tags are the back of old movie stubs.
Page 7:

And the tag on the side of page 7 reads:
 Page 8:

I used another plastic bag that held embellishments to make see-through layers. I cut the plastic so that 3 sides were open and then placed chipboard and stickers on each layer. It is hard to tell in the photo, but the top layer has the star chipboard circle and the "i", the second layer has the blue circle and the word "see" and the bottom layer (the cardboard) has the biggest circle and the word "you!"
Page 9 and 10 is a thin sheet of cardboard that came in a package of scrapbook rub-ons. It had writing on the front so I just covered it with scraps of patterned paper.
Page 9:

And Page 10:

The ticket stubs read: Reuse the chipboard outlines of flowers, shapes and letters over and over by painting inside the shape! This is one of my favorite things to do. It saves me from having to buy a stamp or stickers and lets me experiment with different colors and textures!
Back inside cover:

This is probably the best tip that I can pass on to you. I have read many things about "going green" and most of them come down to this one thing: Simplify. I hope that this scrapbook helps you to simplify your scrapbooking. I am not saying to never buy new supplies. But I am saying that think of everything you use as a possible supply for your projects. And think of ways to reuse the things you do buy.
Back cover: Do you have any green tips on scrapbooking or everyday life? Please feel free to share on Erica's blog (link on the right under Scrapbooking) and have a chance to win a prize!! You are also welcome to share your tips here too!
Have a great, green day everyone!
 ...The colors of the sunset were just breathtaking. We could have spend $350 for professionals to take our pictures on the beach at sunset, but I decided to try it ourselves. This is one of my favorites.


 I had to take a bite out of it right out of the box. And it didn't disappoint. It was so rich, so gooey, it was delicious. I put the package in the refrigerator to hide it from the boys. When I told Seth about it he asked if I already ate them all. Ha. Ha. I would never do that! ;)


 My sweet Noah on the swing. I look at this picture and realize how much he has grown up this past year. Wow.

 Noah took this picture while I was on the swing.


